
지금까지는 개인적으로는 mysql과 mariadb를 설치해서 사용하고 있었는데 아무래도 실무적으로는 절대적으로 오라클이기 때문에 오라클 환경에서 연습을 하는게 좋겠단 생각에 오라클 데이터 베이스를 설치하도록 마음 먹었다.
우선 오라클 설치 파일을 다운로드 받고 설치하도록 하자. 버전은 리눅스용은 11g와 12g를 지원한다고 되어있다. 무료인 XE 버전을 설치하도록 하자. Express Edition
https://www.oracle.com/database/technologies/xe-prior-release-downloads.html
XE Prior Release Archive
Getting Started: Support Oracle Database Express Edition (XE) is a community supported edition of the Oracle Database family. Please go to the Oracle Database XE Community Support Forum for help, feedback, and enhancement requests. Note: Oracle Support Ser
www.oracle.com
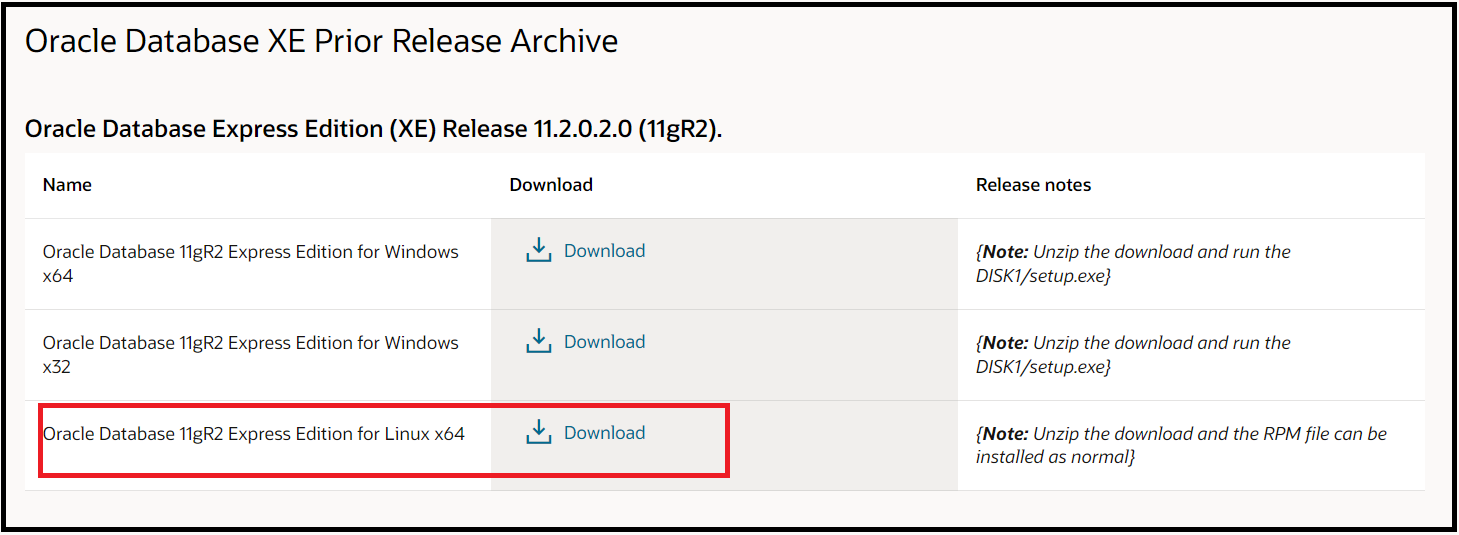
해당 파일을 다운받고 특정 경로로 넣어준다. sftp 같은 것을 이용해서 업로드해주면 된다. 압축이 된 상태라서 압축을 먼저 풀어준다.
$unzip oracle*.zip
오라클을 설치하기 위해선 요것들이 필요하다고 한다. 설치해준다.
$ sudo apt -y install alien libaio1 unixodbc
이제 다운 받은 rpm 파일을 우분투에 설치하기 위해서 deb 파일로 변환해준다.
$ sudo alien --scripts -d oracle*
oracle-xe_11.2.0-2_amd64.deb generated
정상적으로 완료되면 아래처럼 deb 파일이 생성 된다.

그 다음 생성된 deb 파일로 오라클을 설치해준다.
$ sudo dpkg --install oracle*.deb
Selecting previously unselected package oracle-xe. (Reading database ... 257612 files and directories currently installed.) Preparing to unpack oracle-xe_11.2.0-2_amd64.deb ... Unpacking oracle-xe (11.2.0-2) ... Setting up oracle-xe (11.2.0-2) ... Executing post-install steps... /var/lib/dpkg/info/oracle-xe.postinst: line 114: /sbin/chkconfig: No such file or directory You must run '/etc/init.d/oracle-xe configure' as the root user to configure the database.
$ sudo /etc/init.d/oracle-xe configure
Oracle Database 11g Express Edition Configuration
-------------------------------------------------
This will configure on-boot properties of Oracle Database 11g Express
Edition. The following questions will determine whether the database should
be starting upon system boot, the ports it will use, and the passwords that
will be used for database accounts. Press <Enter> to accept the defaults.
Ctrl-C will abort.
Specify the HTTP port that will be used for Oracle Application Express [8080]:5050
Specify a port that will be used for the database listener [1521]:15217
Specify a password to be used for database accounts. Note that the same
password will be used for SYS and SYSTEM. Oracle recommends the use of
different passwords for each database account. This can be done after
initial configuration:
Password can't be null. Enter password:
The password you entered contains invalid characters. Enter password:
The password you entered contains invalid characters. Enter password:
Confirm the password:
Do you want Oracle Database 11g Express Edition to be started on boot (y/n) [y]:y
Starting Oracle Net Listener...Done
Configuring database...Done
Starting Oracle Database 11g Express Edition instance...Done
Installation completed successfully.
필요한 서비스 포트들을 설정하고 패스워드를 입력하고 잘 기억을 해놓자.
뭐 성공했다고 나온다. 이제 vi로 환경변수를 설정해준다.
$ vi ~/.bashrc
export ORACLE_HOME=/u01/app/oracle/product/11.2.0/xe
export ORACLE_SID=XE
export NLS_LANG=`$ORACLE_HOME/bin/nls_lang.sh`
export ORACLE_BASE=/u01/app/oracle
export LD_LIBRARY_PATH=$ORACLE_HOME/lib:$LD_LIBRARY_PATH
export PATH=$ORACLE_HOME/bin:$PATH
리스너 상태 확인
$ lsnrctl status
LSNRCTL for Linux: Version 11.2.0.2.0 - Production on 20-JUN-2023 22:38:02
Copyright (c) 1991, 2011, Oracle. All rights reserved. Connecting to (DESCRIPTION=(ADDRESS=(PROTOCOL=IPC)(KEY=EXTPROC_FOR_XE))) STATUS of the LISTENER ------------------------ Alias LISTENER Version TNSLSNR for Linux: Version 11.2.0.2.0 - Production Start Date 20-JUN-2023 22:31:47 Uptime 0 days 0 hr. 6 min. 16 sec Trace Level off Security ON: Local OS Authentication SNMP OFF Default Service XE Listener Parameter File /u01/app/oracle/product/11.2.0/xe/network/admin/listener.ora Listener Log File /u01/app/oracle/diag/tnslsnr/ubuntu20/listener/alert/log.xml Listening Endpoints Summary... (DESCRIPTION=(ADDRESS=(PROTOCOL=ipc)(KEY=EXTPROC_FOR_XE))) (DESCRIPTION=(ADDRESS=(PROTOCOL=tcp)(HOST=ubuntu20)(PORT=15217))) (DESCRIPTION=(ADDRESS=(PROTOCOL=tcp)(HOST=ubuntu20)(PORT=5050))(Presentation=HTTP)(Session=RAW)) Services Summary... Service "PLSExtProc" has 1 instance(s). Instance "PLSExtProc", status UNKNOWN, has 1 handler(s) for this service... Service "XE" has 1 instance(s). Instance "XE", status READY, has 1 handler(s) for this service... Service "XEXDB" has 1 instance(s). Instance "XE", status READY, has 1 handler(s) for this service... The command completed successfully
$ sqlplus system
SQL*Plus: Release 11.2.0.2.0 Production on Tue Jun 20 22:40:47 2023
Copyright (c) 1982, 2011, Oracle. All rights reserved.
Enter password:
Connected to: Oracle Database 11g Express Edition Release 11.2.0.2.0 - 64bit Production
SQL>
아까 설정할때 입력했던 비밀번호로 접속 완료!
처음 접속해야할 계정이 필요하기 계정을 만들어준다.
접속 계정 생성하기
SQL> create user [id] identified by [pw];
SQL> GRANT CONNECT, RESOURCE TO 유저명;
접속 권한까지 세팅하고 접속을 해준다. 접속 툴로는 DBeaver 나 SQLGate를 추천한다. 여러 종류의 디비를 접속하는데는 DBeaver가 좋고 SQLGate가 좀 더 강력한 기능들을 많이 지원해준다.
'dev' 카테고리의 다른 글
| 2024년 리눅스마스터, 디지털정보활용능력 시험일정 (0) | 2023.12.09 |
|---|---|
| 2024년 SQLD, SQLP, ADP, ADSP, DAP, DASP 시험 일정 (1) | 2023.12.03 |
| SQLD 51회 2023년 11월 18일 기출 정답 정리 (52) | 2023.11.21 |
| 무료 SSL 인증서 적용(Let's Encrypt) (3) | 2023.08.19 |
| 코드 주석 작성 모범 사례 (0) | 2023.06.10 |
| Http 307 Temporary Internal Redirect 원인과 에러 해결 방법 (0) | 2023.02.18 |
| ChatGPT API Python, Node.js, Java example(예제) (3) | 2023.02.14 |
| 포스트맨(postman) 사용법(설치, 다운로드) (0) | 2023.01.31 |
